1. Setting the central point
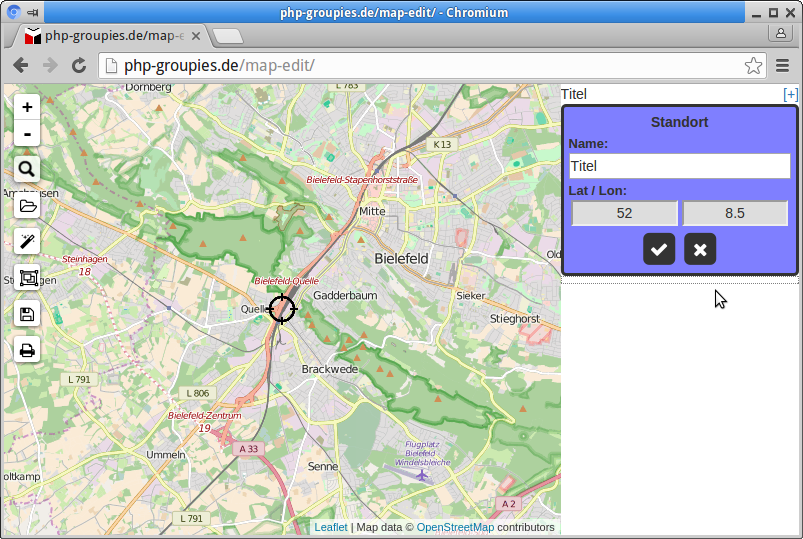
The first thing to do is to set the central point for which you want to create a neighbourhood plan. You will see a blue form in the side bar titled "Standort" and a croshair marker on the slippy map.
You can move the crosshair marker to the desired spot in three different ways:
-
by dragging the markrer to the desired position with the mouse
-
by moving the map while the marker stays in the center of the map area until the desired spot is below the marker
-
by doing a search and selecting one of the found objects, the marker will then be set to the position of the selected object
When you have found the desired position you can close the form with the 🗹 button. The position of the marker is now fixed. To change its position again you can click on the crosshair marker to re-open the form.
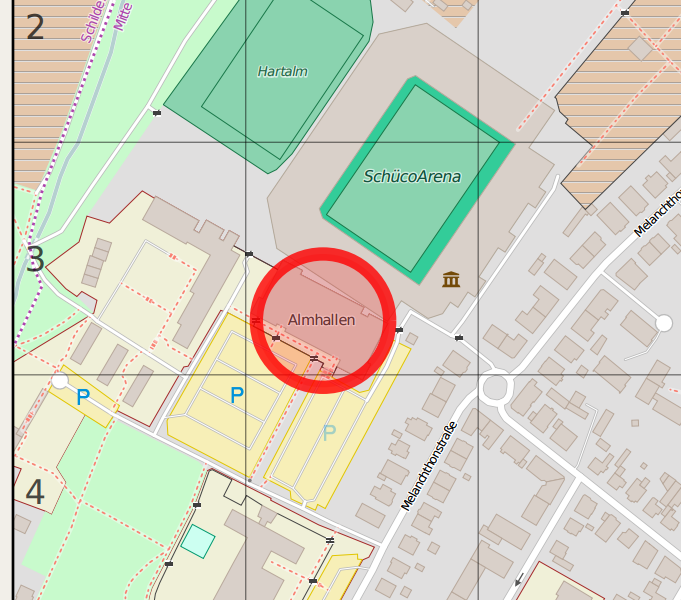
On the printed map the central point position will be marked with a red "you are here" circle.
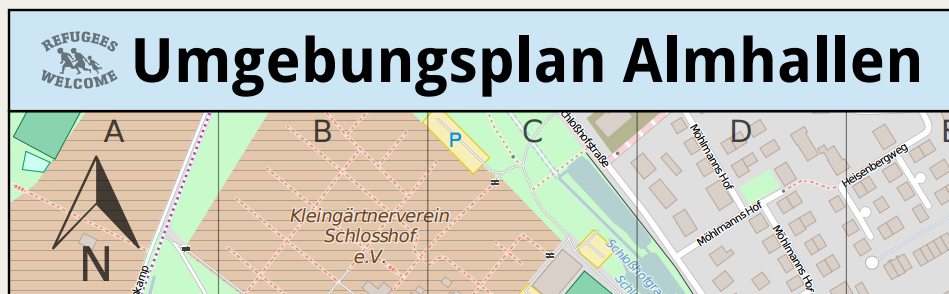
2. The map title

The map title can be set via the "Name:" field of the central point form .
On the printed map the given title will be shown in the blue title bar, right next to the "Refugees welcome" logo:
3. Creating a marker category
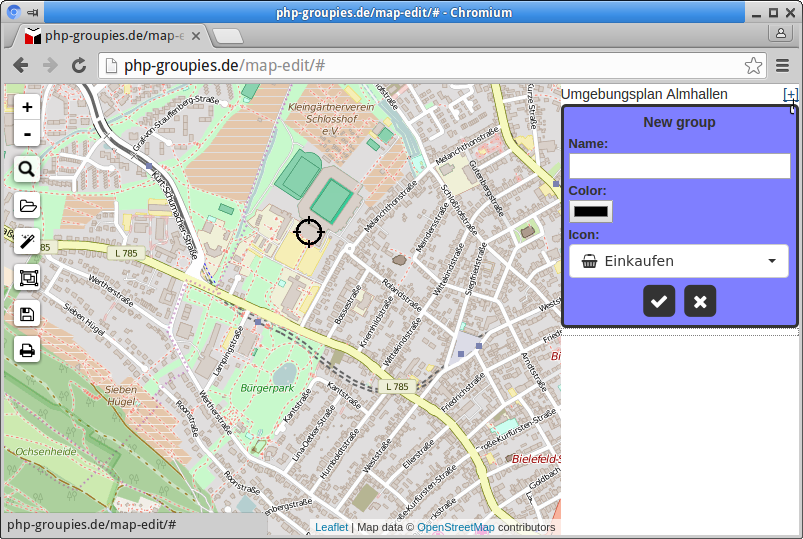
The map markers are organized into categories, each having its own category title and marker color scheme. With the [+] button in the upper right corner you can create new categories.
Each category gets its own title, a distinct color used for the markers and the category title bar, and an icon to be shown in the title bar next to the title.
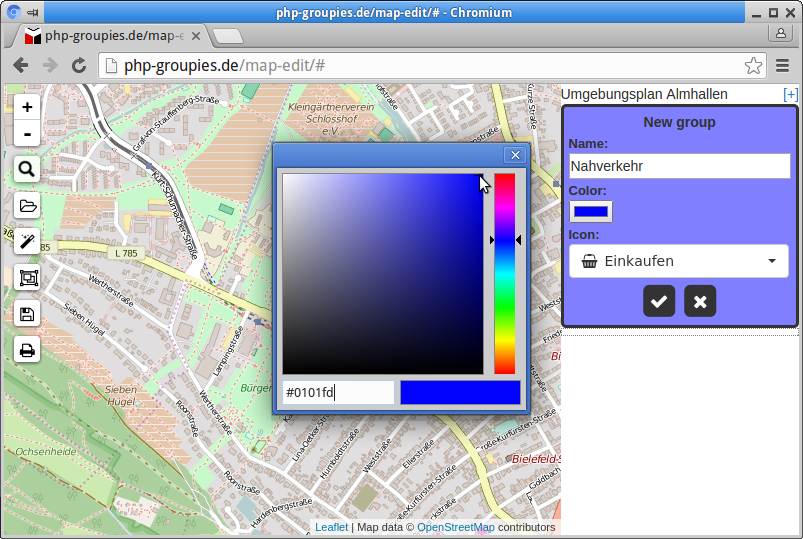
The color picker may look differently depending on which web browser is used, here you see what it looks like in Google Chrome:
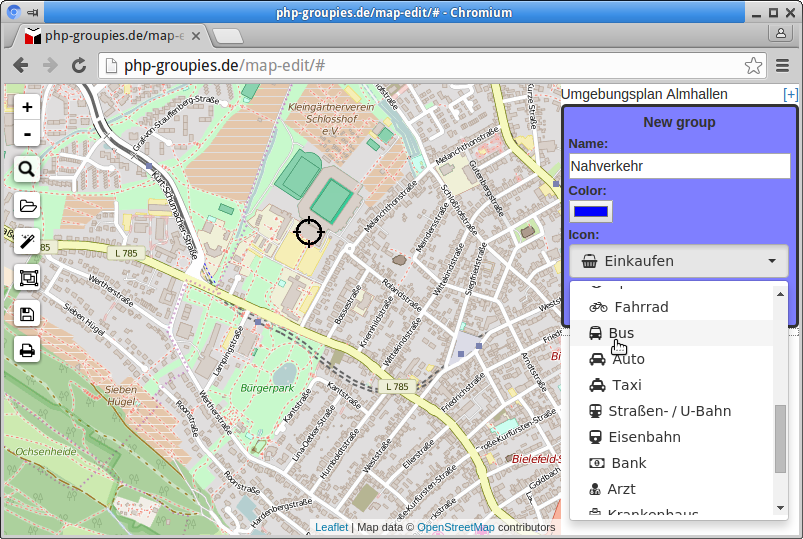
The category icon can be selected from a list of predefined symbols.
4. Placing a marker
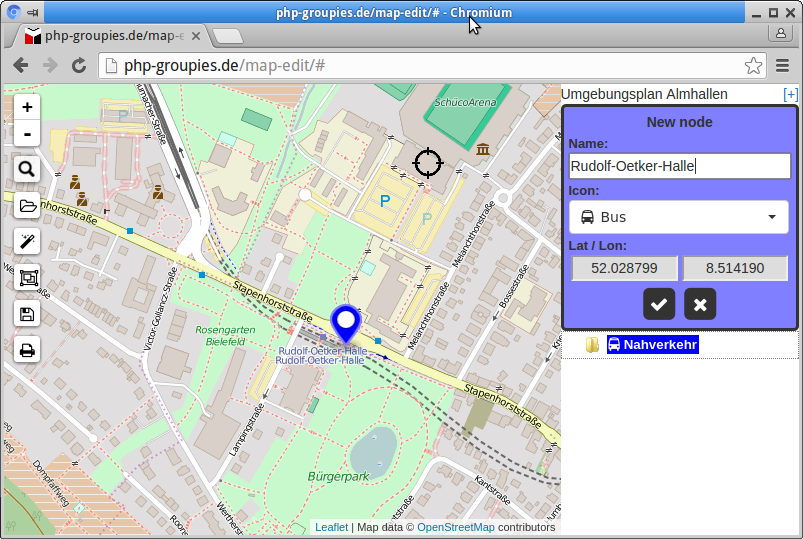
After having created at least one category it is now possible to place actual markers for points of interest. For this you need to click on the category title with the right mouse button, or long-press the category title when using a touch screen. This will open a context menu in which you see a menu item "Add POI"
For each marker a name and a symbol icon can be set to be shown in the sidebar of the printed map.
Initially a new marker is shown in the middle of the map, like with the center marker at the beginning you can either drag the marker to the desired position, or move the slippy map below it until the tip of the marker is over the desired position.
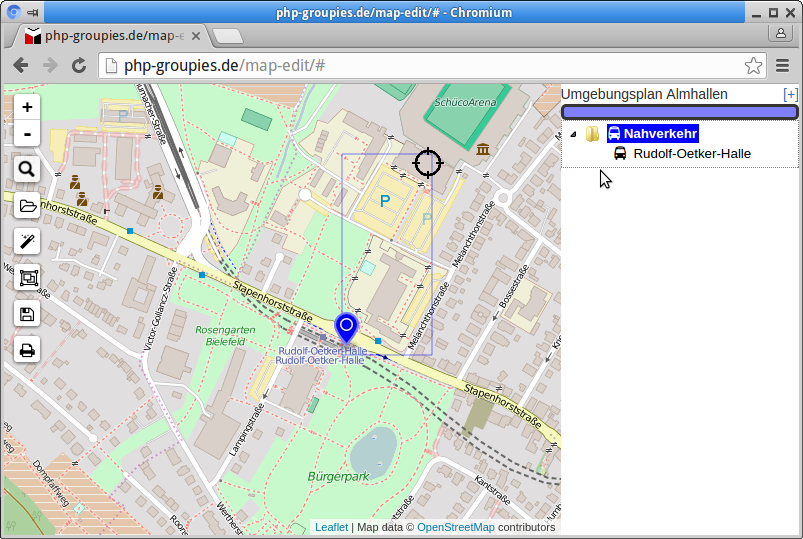
After having placed at least one marker a blue rectangle outline will appear on the map. This is showing the area guaranteed to be visible on the printed map, so that all markers can be seen. As the actual map area on the printed map is more or less square the actually printed area will be extended either vertically or horizontally, depending on whether the marked area is rather wide or tall.
5. Automatic POI marker placement
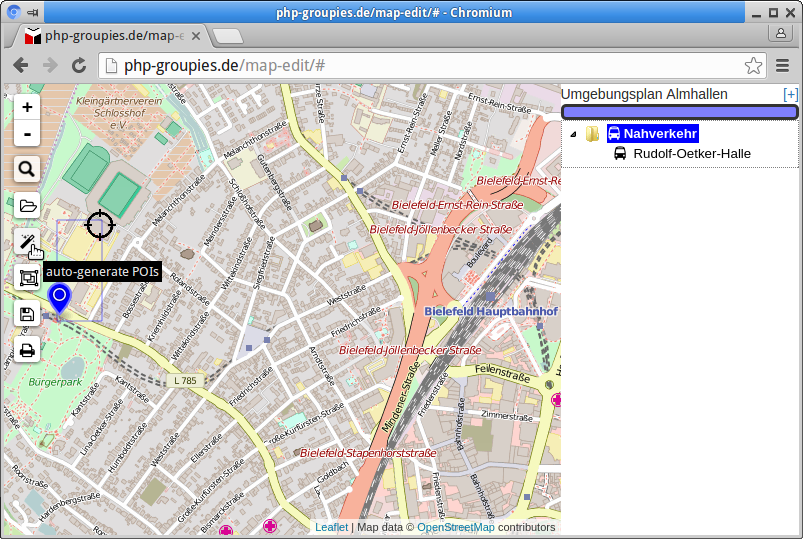
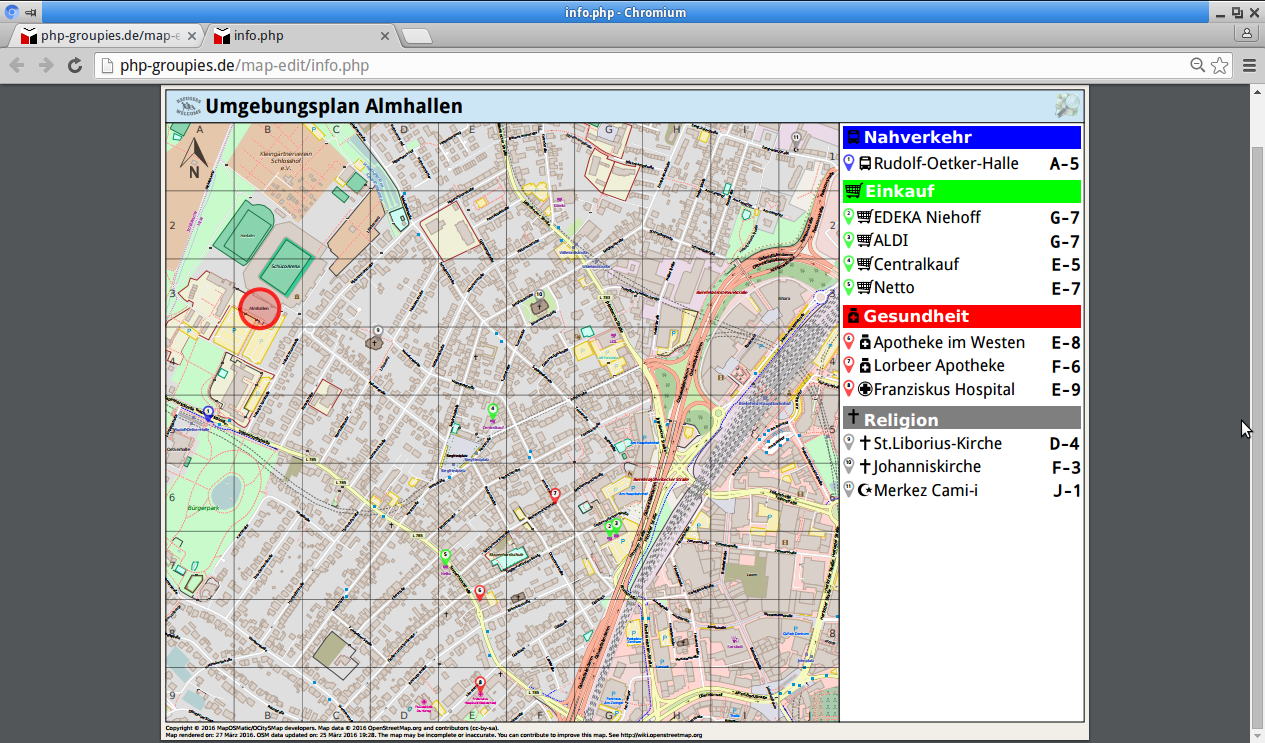
The "wizzard stick" icon in the icon bar on the left some typical marker categories are auto-generated and filled with markers for some typical types of POIs located in the currently visible map area.
For now these are:
-
hospitals
-
pharmacies
-
supermarkets
-
churches (only protestant and catholic) and mosques
The suitable marker entries for the visible map area are determined via a live query using the Overpass API, so depending on the visible area this may take a few seconds.
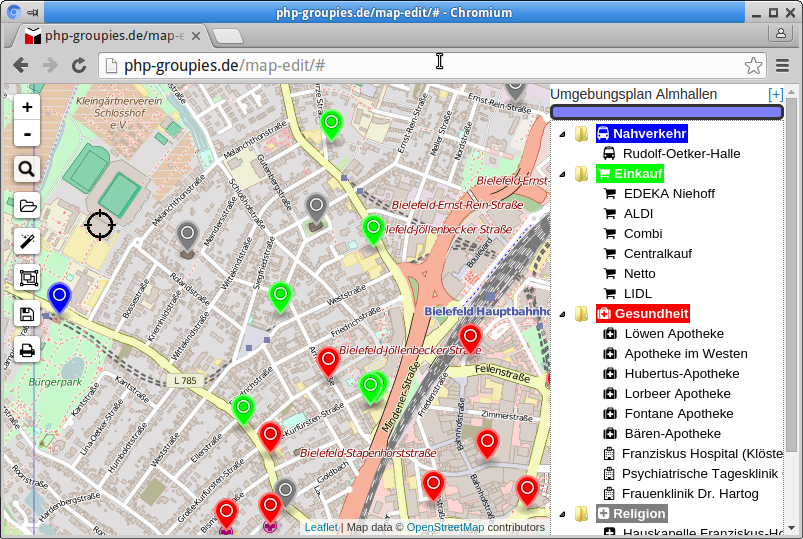
After invoking the wizzard the result may e.g. look like this:
6. Editing markers
You may, especially after using the wizzard to auto-generate markers, want to be able to remove an already created marker. This can be done in two ways.
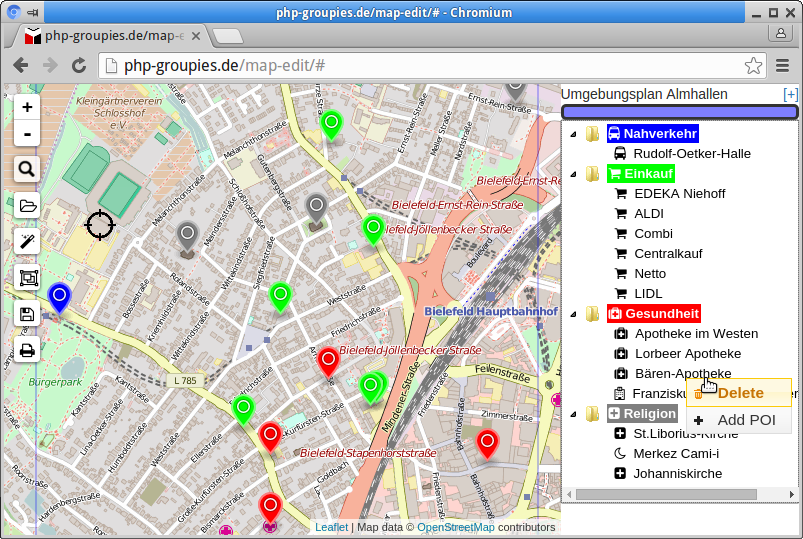
Each entry in the tree has its own context menu which opens when doing a right-click on the entry, or when doing a long press on it on a touch screen. The options in the context menu allow to delete a single marker, or to remove a complete category including all of its markers.
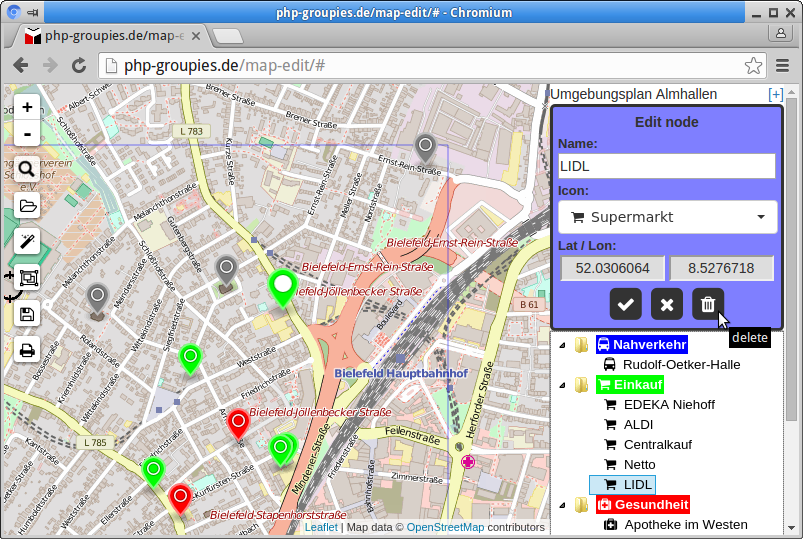
By simply clicking on a marker, or tapping on it in a touch screen, the edit menu for the marker opens in the side bar. Here you can not only change title, symbol and position of the marker, you can also use the "Trashcan" button to remove the marker completely.
It is also possible to move markers to a different category by using drag&drop to move the entry to a different position within the category/marker tree.
7. Show all markers
With the "picture frame" icon in the icon bar the map position and zoom will be changed so that all current markers are visible. For this the map may be panned and the zoom factor may change.
8. Saving and loading
These two functions are only in a rudiemtary state for now.
With the "Floppy disk" symbol the current map state will be downloaded as a file using the map title as base name and the file extension ".map" into the default download directory of your browser. Changing the file name or the directory is not possible. Saving only works locally on the current client device, there is no server side storage functionality yet.
Using the "open folder" icon you can load a previously saved ".map" file to continue editing.
9. Create the printable map
When having placed all desired POI markers you can use the "Printer" Icon to create the actual printable map file. This will be created as a PDF using the DIN-A1 poster size paper format (ca. 80x60cm or 36x24") and will be downloaded automatically.
In the future it may also be possible to choose a different file format, like SVG or PNG.